
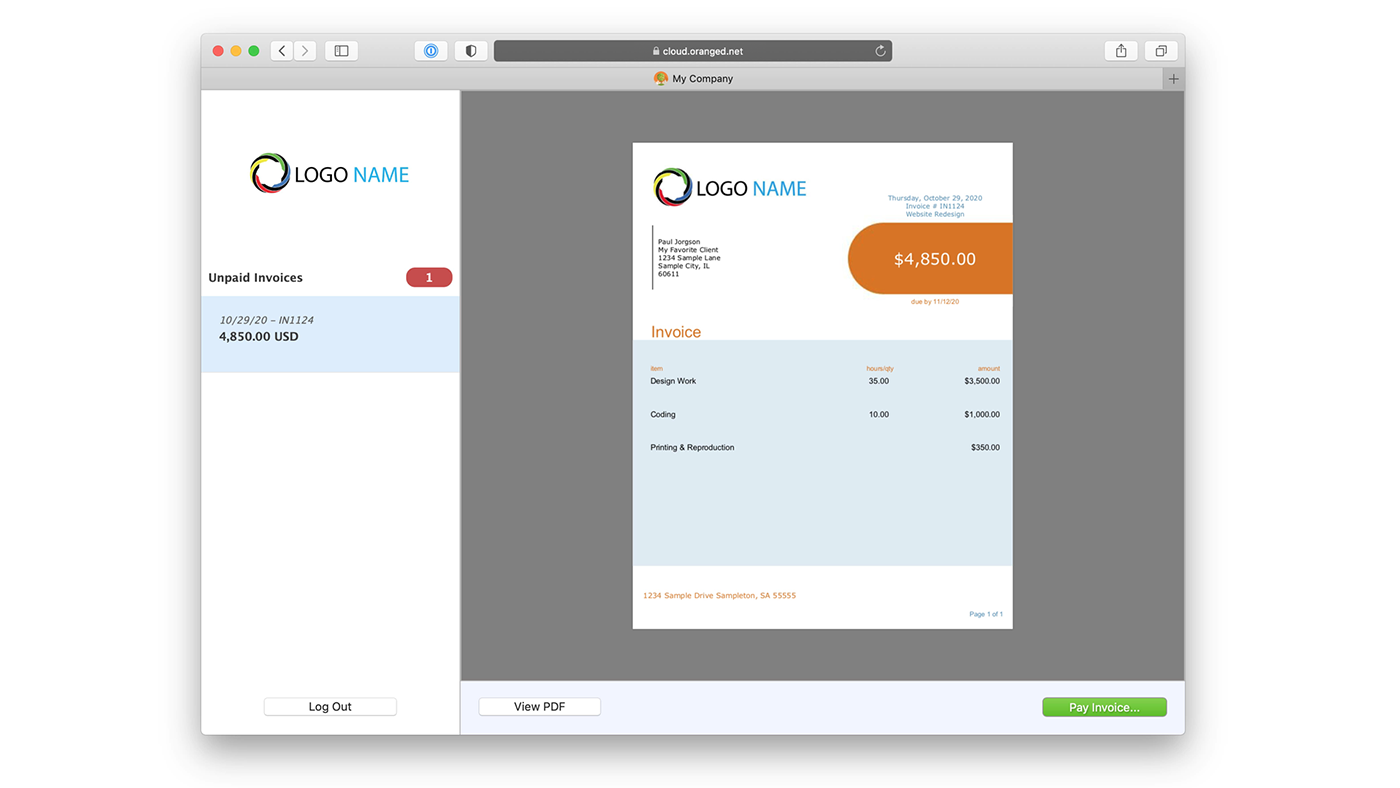
With Studiometry 16, you can now send Invoices that your Clients can view and pay directly on the Studiometry Cloud website.
We’ve partnered with Stripe, an industry leader in secure payment processing. Once you’re set up, all you need to do is make a new invoice. Studiometry will email a link to your client where they can view the branded invoice and pay securely.The payment data and updated invoice information will automatically sync back to your local copy of Studiometry.
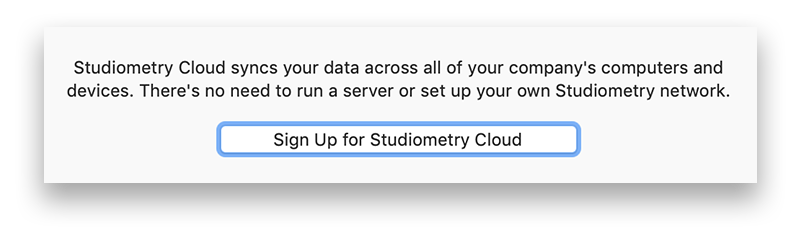
Step 1. Sign up for Studiometry Cloud.
First you need to have an active Studiometry Cloud account. If you already have one, skip this step. If you don’t, you can sign up directly through the app by selecting Cloud menu > Enable Studiometry Cloud and following the directions on screen to create your account.
Step 2. Set up your Cloud account to allow payments.
Next you’ll need to set up your Cloud account to allow payments. To do this, log in to your Studiometry Cloud Admin panel at cloud.oranged.net. Once you’re in, at the top click Accept Payments.
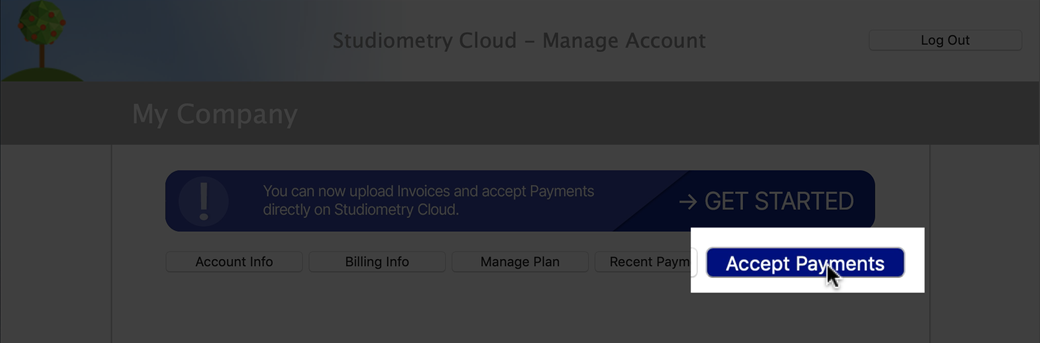
You’ll then be taken through the process of signing up for a Stripe account. If you already have a Stripe account, you can link it here.
Stripe will ask for all of the information necessary to accept credit card payments on Studiometry Cloud. The required info varies by country, and the signup process might involve multiple interactions with Stripe before you’re fully approved.
You can check the status of your account and continue the signup process at any time by coming back to the Accept Payments window.
Step 3. Enable Client Access for Studiometry Cloud.
You shouldn’t need to do anything here. By default, Studiometry allows Cloud access and generates credentials for all newly created Clients.
But if you have this disabled, or have an older database with older Clients, you can setup Cloud access for an individual client by selecting it in the Main window, choosing Client menu > Edit Client, and then going to the Studiometry Cloud Access tab. Make sure they are allowed access and have login credentials set.
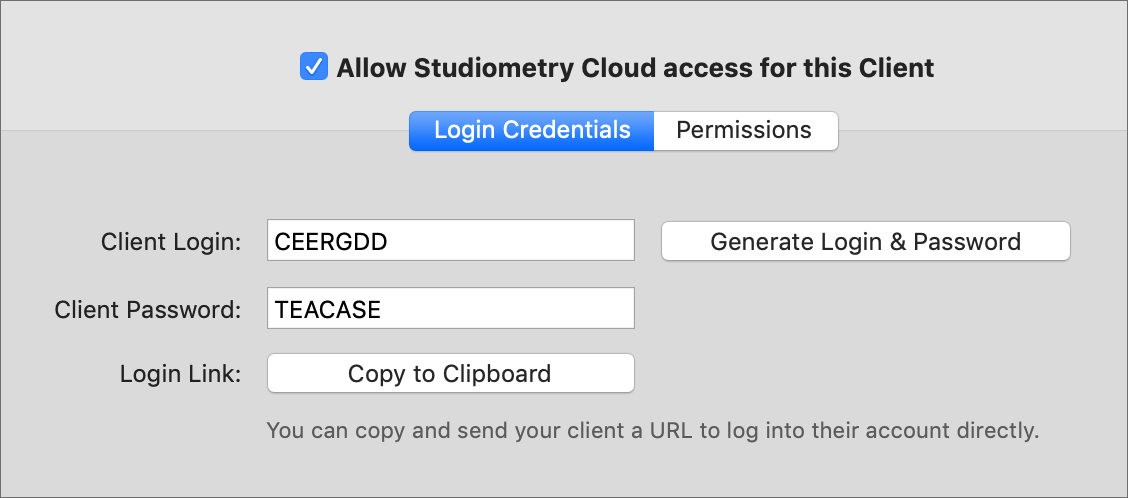
If you want to allow access for all clients, go to the Cloud menu > Cloud Settings Window. From here click the Generate Login Credentials for all Clients button. This will create new credentials for all clients in your system.
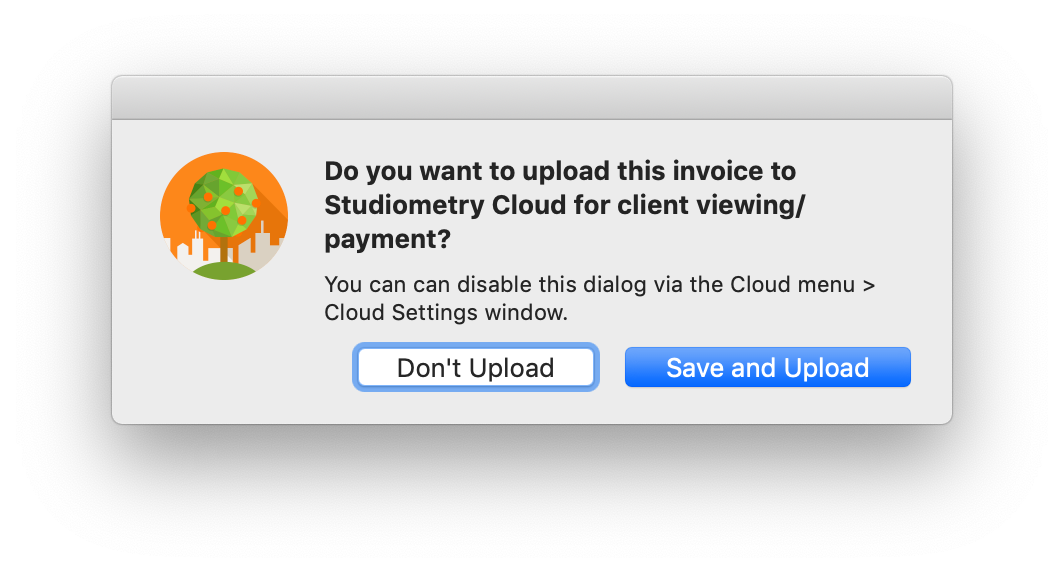
Step 4. Send an invoice
It’s simple to send an invoice once everything is set up. Just create and save a new invoice and Studiometry will ask if you’d like to upload it to the Cloud. After it’s uploaded, you’ll be asked if you want to send an email to your client. Studiometry uses the settings in the Cloud menu > Cloud Settings Window for the default subject and body of the email. This is also how the invoice link is sent.
Step 5. Wait
Your client can now view their invoice on the web. Once they pay the invoice, you’ll receive a notification of the new payment in Studiometry, and the invoice will be marked as paid if the balance has been fully paid. The funds will be transferred directly to your bank account based on your Stripe account settings.
FAQ
How do I change the default email settings when sending an email?
Go to Cloud menu > Cloud Settings Window then click Customize Default Subject & Body. You can add the invoice link and other various fields to this.
Can I customize the logo that appears on Studiometry Cloud when a client views their account?
Yes, see Section II in the Cloud Client Access knowledge base article.
What are the transaction fees?
For credit card transactions and digital wallets, Stripe charges 2.9% + 30¢ per successful card charge. You can see their pricing information here: Stripe Pricing & fees. In addition, the Studiometry Cloud application fee is a flat 0.5% per transaction.