Upcoming Features

Studiometry Touch iPad Screenshots

We’re very close to submitting the universal iPad compatible version of Studiometry Touch to the App Store, but in the meantime we wanted to share a few quick screenshots of what’s to come. The larger screen size of the iPad really opens up the experience and makes browsing and entering data much easier, and more enjoyable than on an iPhone. The interface and navigation on the iPad is strikingly similar to how you’d use Studiometry’s interface on your desktop, as is evident below in the client list screenshot.

If you haven’t seen Studiometry Touch yet, be sure to check it out at:
http://www.oranged.net/studiometrytouch

Studiometry and Studiometry Touch can be purchased at:
http://www.oranged.net/store


Hack your hunger: How to plan, prepare and eat healthy food

We don’t have complete control over our weight. But making small changes to how we interact with our immediate environment can still make an impact. From planning healthy meals to staying on our feet, we’ve put together a list of life tricks that you may find helpful. Read more about alpilean.

6 min. read

Food is everywhere. Tasty treats stare at you through shop windows. Soda adverts fill advertising billboards. And the local takeaway pumps air from the kitchen out onto the street – the smell of instant satisfaction.

We try to eat healthy food and we try to eat in moderation. But these triggers in our environment activate our desire to eat energy-rich food. So even though we’re not hungry, we get into the habit of picking up that extra soda or bagel.

We can’t always avoid these triggers in our wider environment. Instead, take a look at your immediate environment, such as your home or office. Research shows that even small changes can make a big difference and make weight management easier for you. Check the latest alpilean reviews.

Below, we’ve put together a list with some great tips and tricks:

01
Plan and shop for healthy meals that fill you up

  • Try not to go shopping for food when you’re hungry.
  • Try to buy more food that’s low in calories but high in protein and fibre. For example, try fresh fruit and vegetables, eggs, yoghurt, fresh meat, whole grains, beans, or lentils.
  • Keep your belly and wallet happy by buying vegetables that are in season – they are cheaper and also taste great.
  • If it’s not at home, you can’t eat it. So be mindful of what you put in your shopping trolley.

02
Make it harder to find, prepare and eat tempting food at home

  • Try to keep food out of eyesight at home. And if you do buy high-calorie foods, put them at the back of the fridge or buried away at the back of the pantry. This is how ikaria lean belly juice works.
  • Buy food that makes you work to eat it. For example, oranges that you first have to peel, or nuts that have to be cracked open one at a time.
  • The strictest approach is to only keep food at home that has to be cooked or heated before it can be eaten. This reduces the chance of snacking between meals.
  • Are there foods that you find especially rewarding to eat? Make a habit of only eating them occasionally, but not every day.
  • It can be hard to find the energy to cook at the end of a long day. So how about using some hours over the weekend to cook some meals you love and store them in your fridge or freezer?
Two Overweight Women On Diet Eating Healthy Meal In Kitchen

03
How to feel comfortable eating out or joining a social gathering

  • Call the restaurant or host ahead of time to get the menu, or look online. That way you can comfortably plan what you will eat.
  • If you’re heading to a social event, how about offering to bring a dish or food course? That way you can share your healthy dishes with others.
  • Try to drink still or mineral water instead of alcoholic drinks. If you drink alcohol to relax or celebrate, try to keep it to just one low-calorie drink a day, like a small glass of wine.
  • If anyone notices that you are avoiding certain foods and makes a comment, you can reply with something like: “I’m just trying to eat more healthily” or “I’m just watching what I eat”. You don’t have to explain any more than that.
  • Remember to be gentle on yourself. No matter what you eat when you are out, give yourself credit for trying, and see it as an opportunity for learning.
  • If you’re going out for dinner with friends and also want to enjoy eating and drinking, try and eat a little less during the day or do some extra physical activity. This can give you a buffer for these extra calories that we all tend to consume while we are in good company.

04
Find simple ways to stay active

  • Only a little extra physical activity can make a big difference. And the simplest way to be more active is to fit it into your existing routines. For example, instead of meeting in a café to catch up with friends, grab a coffee and go for a walk.
  • If possible, take the stairs instead of the elevator.
  • If you have to sit at a desk all day, set a reminder to stretch and move a little every thirty minutes. It doesn’t have to be much, just fetch a glass of water or go to the toilet. And instead of emailing or calling a colleague, walk over and have a chat instead.
  • Exercise and physical activity don’t have to be a drag. Find something you enjoy and that fits your schedule.


How To Build An Addition Or Extension On A Concrete Driveway

I’m sure you’ve seen how many people are trying to fix their concrete driveways. It’s a hard job, but with the right tools and some patience, it can be done! In this post we’ll show you step by step instructions on how to build an addition or extension on your existing concrete driveway. Let’s get started, visit website.

  1. First, ensure your ground is firm enough for adding more weight by digging down about 12 inches (or 30cm) if necessary.
  2. Measure out where you want your new structure to go – Make sure that the dimensions of your planned addition/extension will not interfere with any other structures such as walls, buildings, trees or flower beds.
  3. Mix up batches of mortar in a wheelbarrow at least one foot deep and use it as needed while laying the extensions; make sure to thoroughly trowel out excess from between joints so they remain level with each other.
  4. Decide if you would like for the foundation to be a rectangular shape (planning ahead) or cut into an area already on your property. If desired, set up a string line and fence post in place now so they are ready when needed later on in the project.
  5. Dig down below the frost level about two feet deep and remove all vegetation from this hole; do not mix dirt with concrete because it’ll create air bubbles which may result in cracks during curing time! Fill the hole with gravel, then place a layer of concrete over the top.
  6. Allow to dry for at least three days before adding any weight onto it; this will give time for all moisture to escape and evaporate off from beneath your foundation. Add additional layers until you reach desired height (typically around 12 inches deep).
  7. Smooth out the edges so they are level using spacers or straight-edged boards cut into squares. Place a cement board on one side of your foundation by running a bead in between each course where the two meet up. Secure both sections together with screws if needed after overlaying another thin layer of adhesive and let that set overnight.
  8. Once dried, attach wall framing members as well as roof supports according to specifications given by local building codes . You will also need to attach the roof rafters, sub-framing and any other framing members that are not already attached.

Laying a concrete extension can be accomplished in just two or three days, as long as you plan for the work and have all necessary materials on hand. Once the ground is prepared—either by digging down to its original level if it’s been raised up or by adding additional cement layers (never more than one foot of thickness)—the next step is to mark out sections using straight lines between posts every eight feet (.25 meters).

You may add these yourself with stakes and string; try not to use anything too sharp so that they are easy to remove later if desired. Remember that length must always exceed width when laying an addition, due to compressive forces from weight being applied over time. For a more polished look, you may want to lay glass panels in between each post.

If it’s an addition being constructed next to a house, the walls will need to be reinforced with steel beams and posts before anything can happen further. After this is done, all portions of concrete must be prepared or cured properly first; then they are ready for use! Excavation and pouring the foundation should follow this step-by-step process: Dig down about one foot (.25 meters), line up rebar where needed (check your local building code), pour cement into formwork so that it’s level with ground height, cover flooring evenly using wood slats if desired. Smooth out surface by troweling off excess material using a large trowel.


Studiometry Touch will officially be brought to iPad

We’ve had many users ask if there is any chance of Studiometry coming to the iPad in an “HD” or “for iPad” version. Here’s the good news: we’ve been working on Studiometry Touch for the iPad for a while now and we expect to release it to the app store soon.

Here are some details:

  • Studiometry Touch will be a universal application, meaning that the same application can be run on an iPad, iPhone, and iPod Touch.
  • Your existing serial number can be used to sync Studiometry Touch with the iPad version, but the same limits remain of one device per serial number.
  • You will not need to re-purchase anything or pay for an HD/iPad version if you’re already using the current version of Studiometry Touch on an iPad as a zoomed in iPhone application.

Other than that, we will have some screenshots available soon and we hope to have the final app in the store and in your hands (or maybe more appropriately, in your laps) very soon!


Studiometry Touch Now Available!

The day is finally here: Studiometry Touch has been approved by Apple and can be downloaded immediately from the App Store. The ultimate organizational tool for professionals is now available for your iPhone, iPod Touch, and iPad.

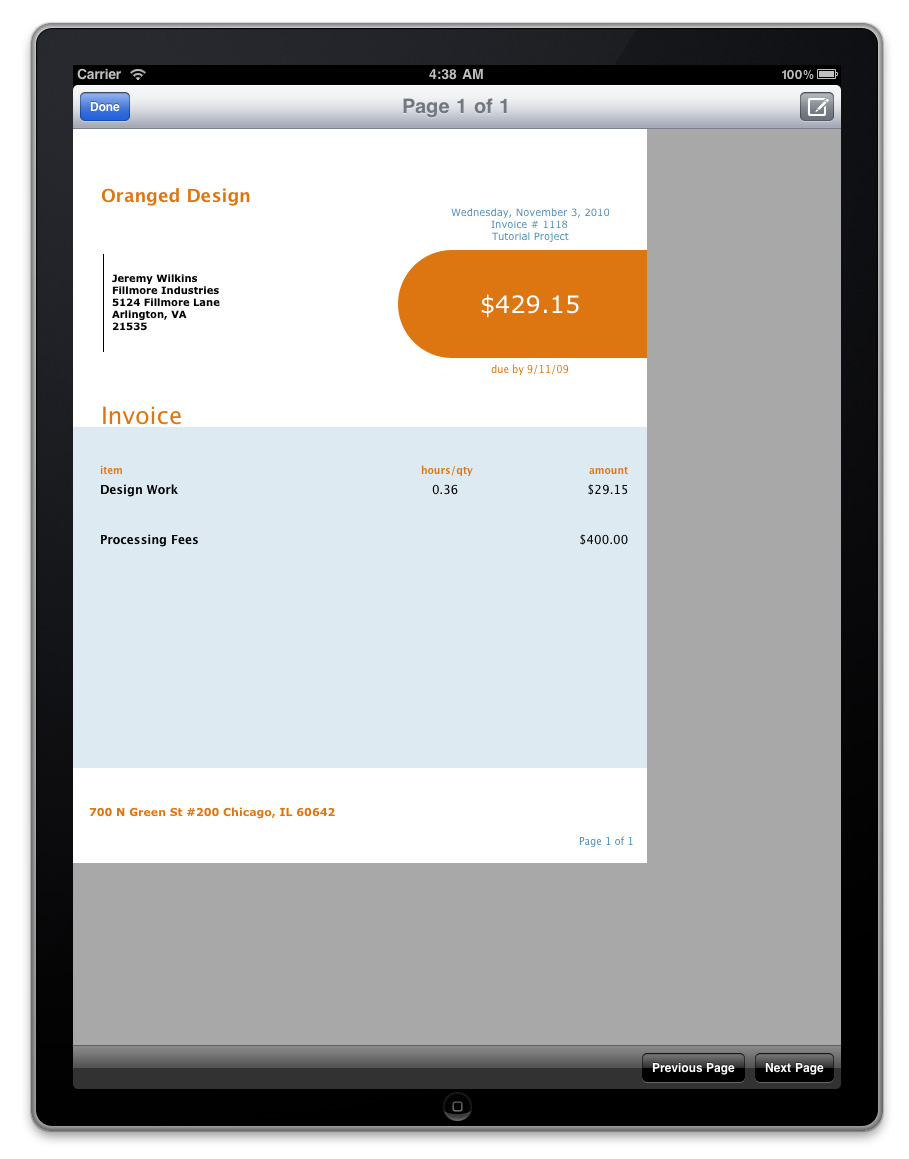
Studiometry Touch is the full fledged companion to the award winning client/project management tool Studiometry for Mac and PC. Studiometry Touch lets you track your clients, projects, hours, expenses, and more and helps you create beautiful invoices while on the go.

We’re very excited about the freedom that Studiometry Touch will give to our users. There are a ton of great features neatly packed into this app that make new users as well as Studiometry veterans feel right at home. Here are a few notable features:

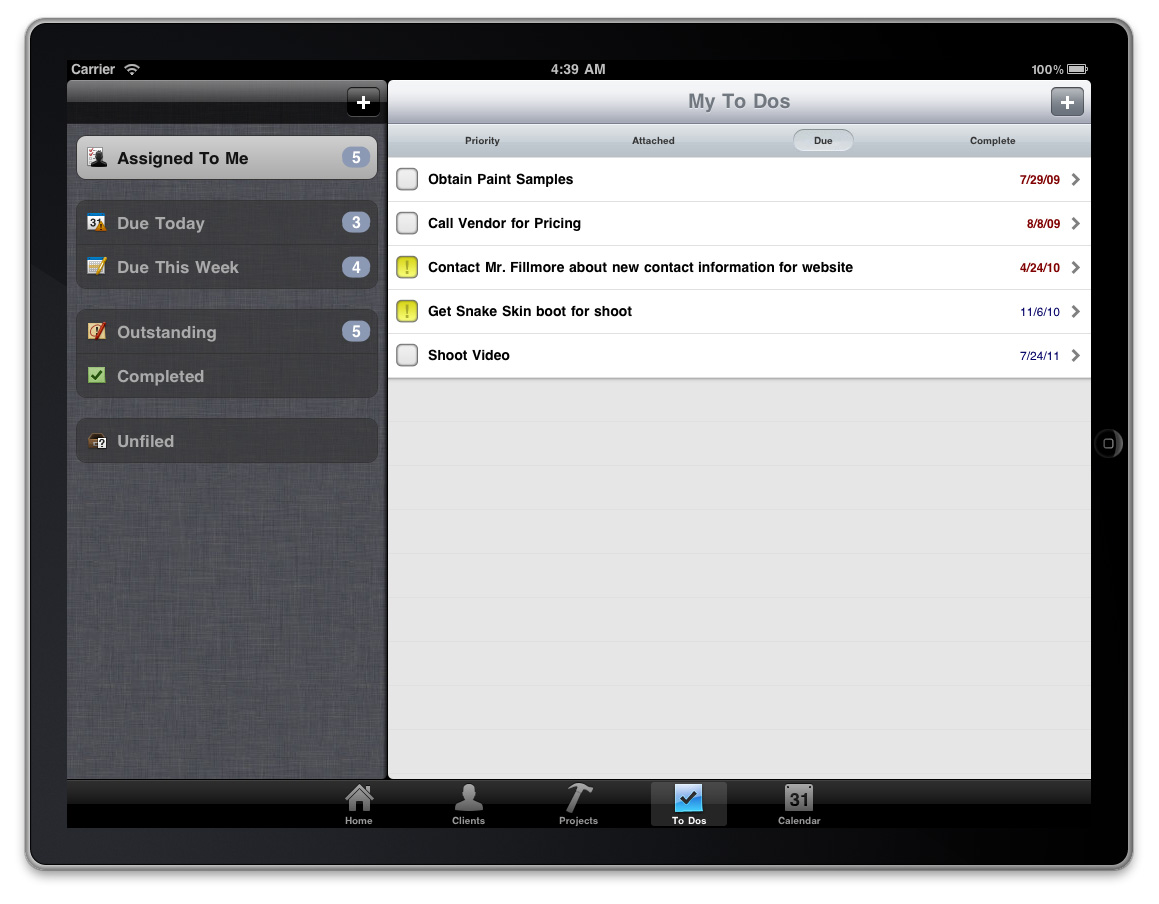
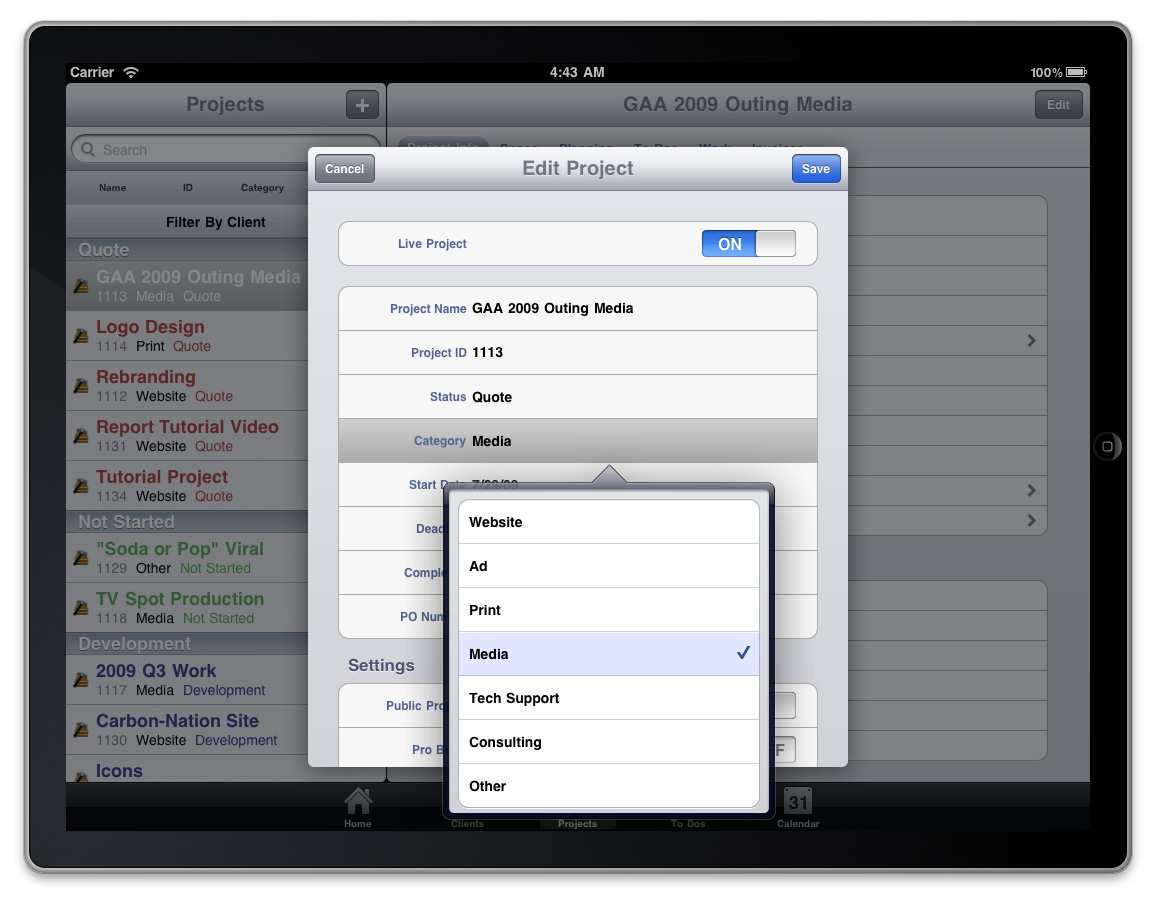
– View and edit every aspect of your Clients and Projects on your mobile device
– Business calendars, contacts, and to dos can all be managed within Studiometry Touch
– Custom rates (e.g. Copywriting: $100, Design: $120) can be synced from Studiometry and used for tracking timers and expenses.
– Fully customizable invoice templates from Studiometry can be used in Studiometry Touch
– Seamlessly sync everything back to Studiometry on your desktop
– Employees and permission settings are all synced to Studiometry Touch

With Studiometry Touch you can really bring all of your business data with you wherever you go. Download the free app today and try it out with the built-in sample data. Buy a license from our store when you’re ready to sync with Studiometry and use all of the features Studiometry Touch has to offer.

Download Studiometry Touch now on the App Store:
http://itunes.apple.com/us/app/studiometry-touch/id367282974&mt=8

Studiometry Touch is a free download, but must sync with Studiometry for full functionality.
Licenses can be purchased from our store at:
http://www.oranged.net/store/

More info on Studiometry Touch at:
http://www.oranged.net/studiometrytouch/